With the recent release of the RStudio v1.1 it’s an opportune time to release this guide on how you can have your own RStudio server hosted in the cloud.
Having the ability to do data analysis in the cloud can be very useful if you need more processing power than your computer has. It also means all you need is an internet connection to be able to perform your data analysis wherever you are.
This tutorial will walk through how to set up RStudio on Digital Ocean. Digital Ocean offers cloud computing services and is very user friendly in my opinion.
If you sign up for Digital Ocean through this link you will get $10 in free credit to use. This will last for 2 months on a machine with 512MB ram, or 1 month on a machine with 1GB ram. Either way more than enough time to get all the way through this tutorial and give it a proper test drive.
Let’s Get Going
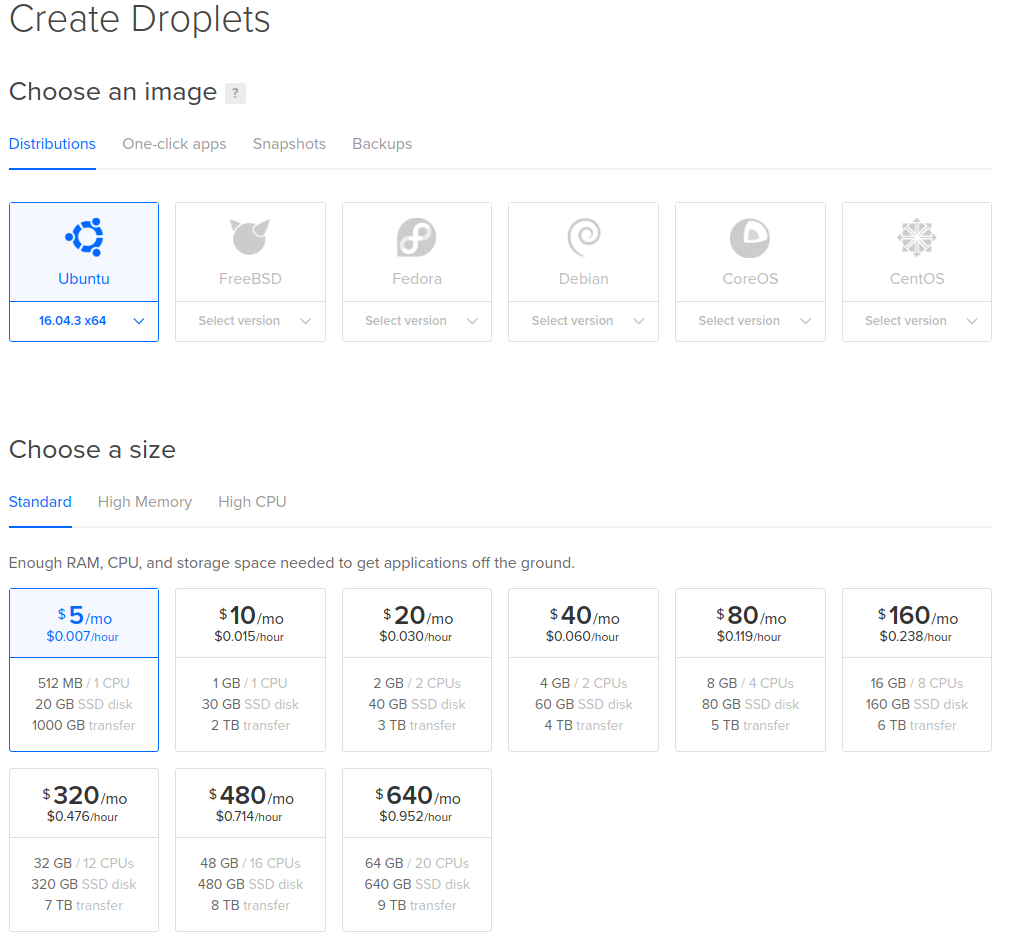
Once you have logged in to your digital ocean account create a droplet (Digital Ocean’s name for a server) with an Ubuntu distribution. The smallest size server will be fine for this tutorial.
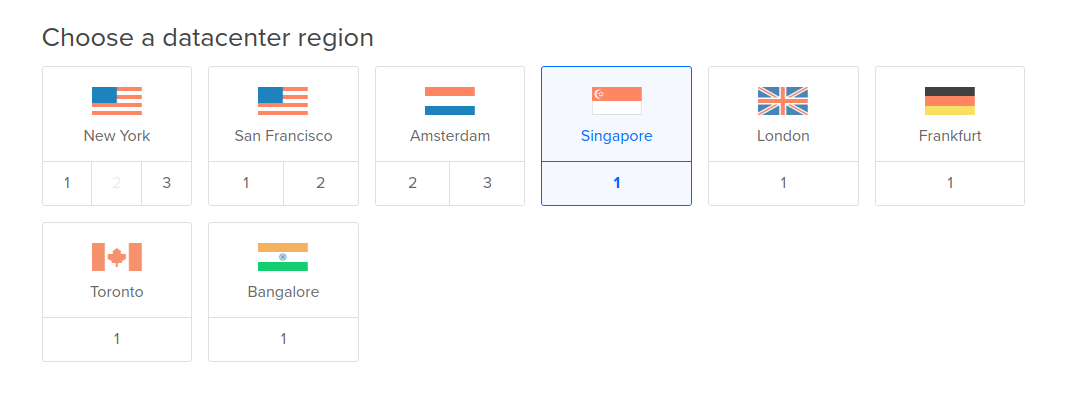
Choose a region that is the closest to you.
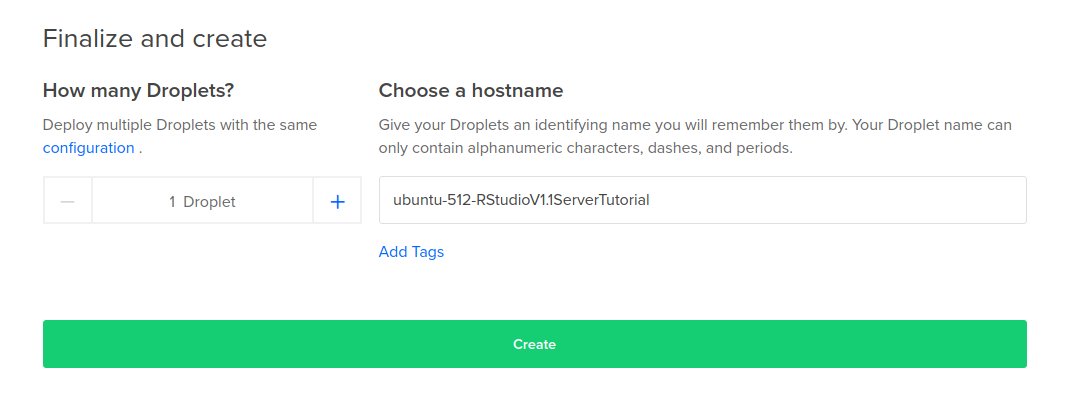
Finally name this ‘droplet’ and click create
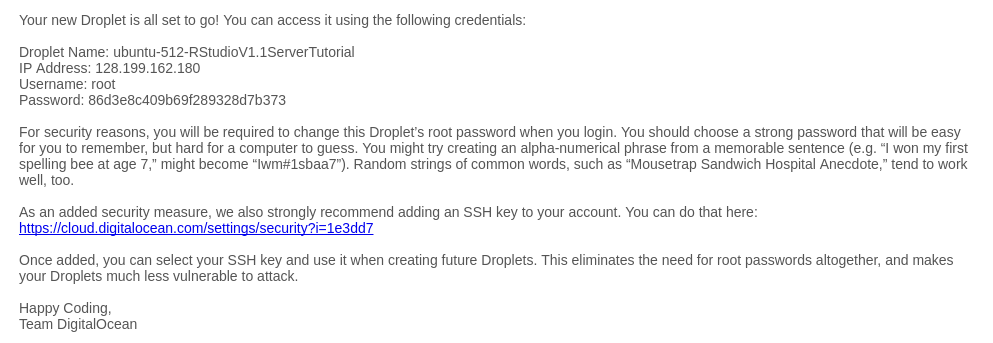
You should then receive an email from Digital Ocean. This email contains credentials so you can login to the droplet that was just created.
Future steps require you to SSH into the droplet. If you use a mac or a linux machine this is trivial. For those using windows you will need to install additional software to do this. This guide walks through downloading and using Cygwin, a linux emulator you can use to SSH into the droplet.
This tutorial continues with Linux.
Log in to this server by typing ‘ssh root@’ followed by the IP address. Confirm you want to continue connecting and enter the password received in the email.
ssh root@128.199.162.180
You will then be prompted to change your password.

One of the first things we need to do is to update the software on the droplet so that it has all the latest security and performance upgrades.
sudo apt-get update

sudo apt-get upgrade
The following steps will install the required software. It will install R, RStudio and a couple of prerequisites. Enter the following into the command line of the droplet.
sudo apt-get install r-base libapparmor1 gdebi-core
wget https://download2.rstudio.org/rstudio-server-1.1.383-amd64.deb -O rstudio.deb
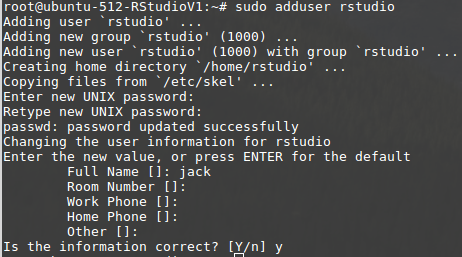
sudo gdebi rstudio.debNow lets add a user to RStudio called ‘rstudio’ so we can actually use it
sudo adduser rstudioWhen running this you will need to create a password. It will also ask you to fill in some personal details of the user but you can skip over these if you want to.
Then we can restart the droplet by running the following command
sudo shutdown -r now
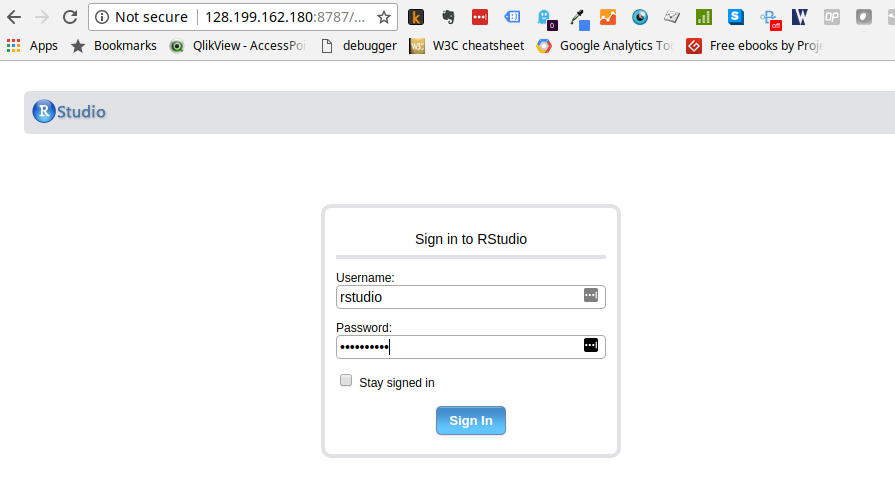
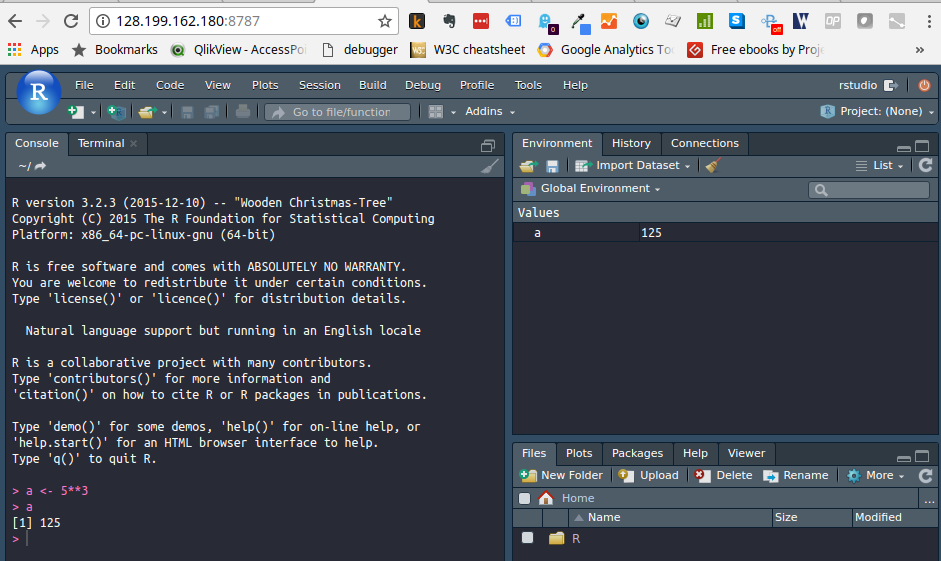
Once this is complete we can access RStudio via the bowser by navigating to the droplet address + ‘:8787’. In my case this is 128.199.162.180:8787
You will then be greeted by a login screen. Enter the credentials we just made for the ‘rstudio’ user.
Once logged in you will now see the familiar RStudio screen. Congratulations you made it!
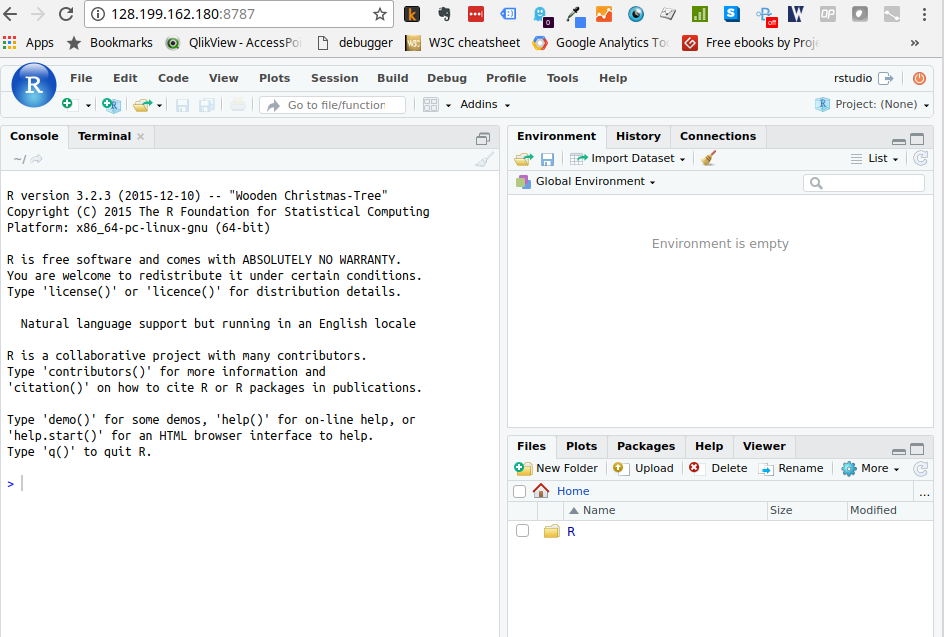
To make sure we really look the part of a hacker, let’s change to a dark theme in the global options for the extra wow factor
Further Steps
For added security you should implement ssl on the droplet. This tutorial by Digital Ocean will show you how you can set up ssl secure connections on your droplet for free using Let’s Encrypt.
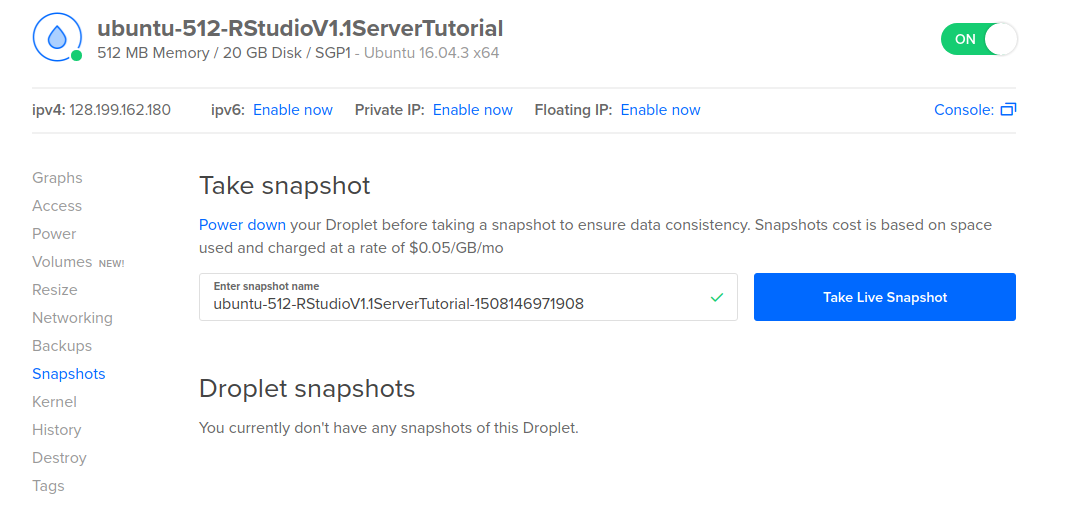
It will also be worth creating a shapshot of this droplet. By doing this you can spin up a copy of this droplet on a machine with much more RAM and CPUs and crush that data analysis with all the extra power.
To add more users login to the droplet from the command line and replace ‘rstudio’ with the name of your new user
sudo adduser rstudio